Learn Lost Arts
  • Learn Lost Arts Blog
  • About me
  • Quilting
  • Quilling
  • Sewing
  • Beading
  • Other Crafts

Quilling High Heel

3/16/2011

1 Comment

 
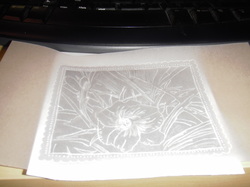
I finally finished it.  I've been working on this high heel for several weeks in my spare time (ha!).  I started with a search on google for high heel shoe under images and then chose line art.  I found a great one at www.WalterFoster.com.  Here was the start:
Picture
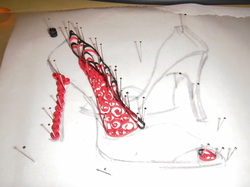
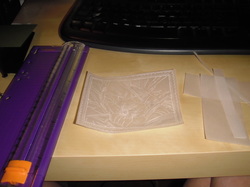
I put the print out on top of a piece of corkboard, put wax paper on top of that (so I don't glue to my pattern) and then I rolled the paper, sometimes using a circle guide to know the circles were the same size. I use stick pins to hold the shapes in place while I glue them together.  White glue that dries clear is what I use both to make the circles and to glue one to another.

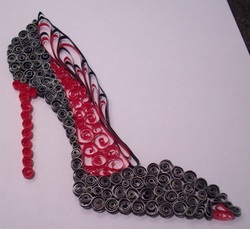
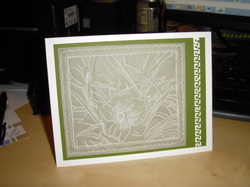
I ordered the specialty paper from whimsiquills.com for the main part of the shoe.  It's black with a silver edge.  I love the way this turned out. I plan to frame it and hang it in my office.

So what are you working on?  What are you proud of that took you a long time to accomplish?  Please, leave a comment and let me know anything on your mind!
Picture
1 Comment

Glass Etching

3/8/2011

0 Comments

 
This past weekend I had the opportunity to take my son to Lake Charles and stay with a wonderful family for Mardi Gras.  Since they had just moved into their BEAUTIFUL home, I decided that I would want to give them a hostess gift for opening their home and family to us.

After seeing her decorating style, I found lots of glass, Fleur de lis, and bronze wrought iron.  So I went to Hobby Lobby and bought a beautiful footed cake stand and decided I would create their last initial in a Fleur de lis and etch it onto the cake stand lid. 

This is a very simple project and something I learned to do in 7th grade art class.  First, you clean the glass.  Next, put masking tape over the glass.  Trace your pattern onto the masking tape and then use an exacto knife to cut away the part of the tape that you want glass etched.
Place glass etching cream (found at the hobby store) on the glass and leave it for about 10 minutes.  I know it says 5, but to make it really stand out, I've found 10-15 works better and it doesn't eat through the masking tape.  Then wash it off and clean your glass thoroughly. 
TaDa!  Fabulous!
Picture
cut out with cream just on the F
Picture
finished product
0 Comments

First Post!

3/2/2011

1 Comment

 
First post!!!  Wow, I'm actually doing it.  I'm doing a blog about what I love.  What will I post first?  What can I write about first? 

Yesterday when I got home, I took a picture I had of a day lilly and turned into black and white.  Then I "glowed" the edges in Adobe Photoshop.
Picture

Picture
Then I put a piece of vellum over it and a piece of silicone (from my embossing machine) under it and used an embossing stylus to trace it. 

I used a needle punch on the holes all the way around and took apart my crafting sandwich.  I trimmed it.  I put it on a piece of green cardstock and punched the side with a fancy punch.  I then added it to a card. 

Craft complete! 

The best part of working on a project is seeing the completed project!  The hardest part is giving it away!!! :)
Picture
Picture
1 Comment
    My Etsy Shop
    Click on any image to enlarge

    Amy

    Craft?  When?  Where?  How do I sign up?  Can I show you?  I love anything I can do with my hands to create something beautiful.

    Archives

    November 2011
    April 2011
    March 2011

    Categories

    All
    Art
    Craft
    Curtains
    Die Cut
    Dry Emboss
    Embroidery
    Felt
    Flower
    Gift
    Glass Etching
    Hostess Gift
    Mother's Day
    Paper Emboss
    Quill
    Sew
    Shoe
    Simple Supplies
    Stamping Ink
    Vellum

    RSS Feed

Powered by Create your own unique website with customizable templates.